
One job record for production, money, artwork and site work
Read the job header, move the status, use the Actions menu and work through the Overview, Tasks, Timesheets, Financials, Artwork, Noticeboard, Photos, Documents and Jobsite tabs on one current job record.
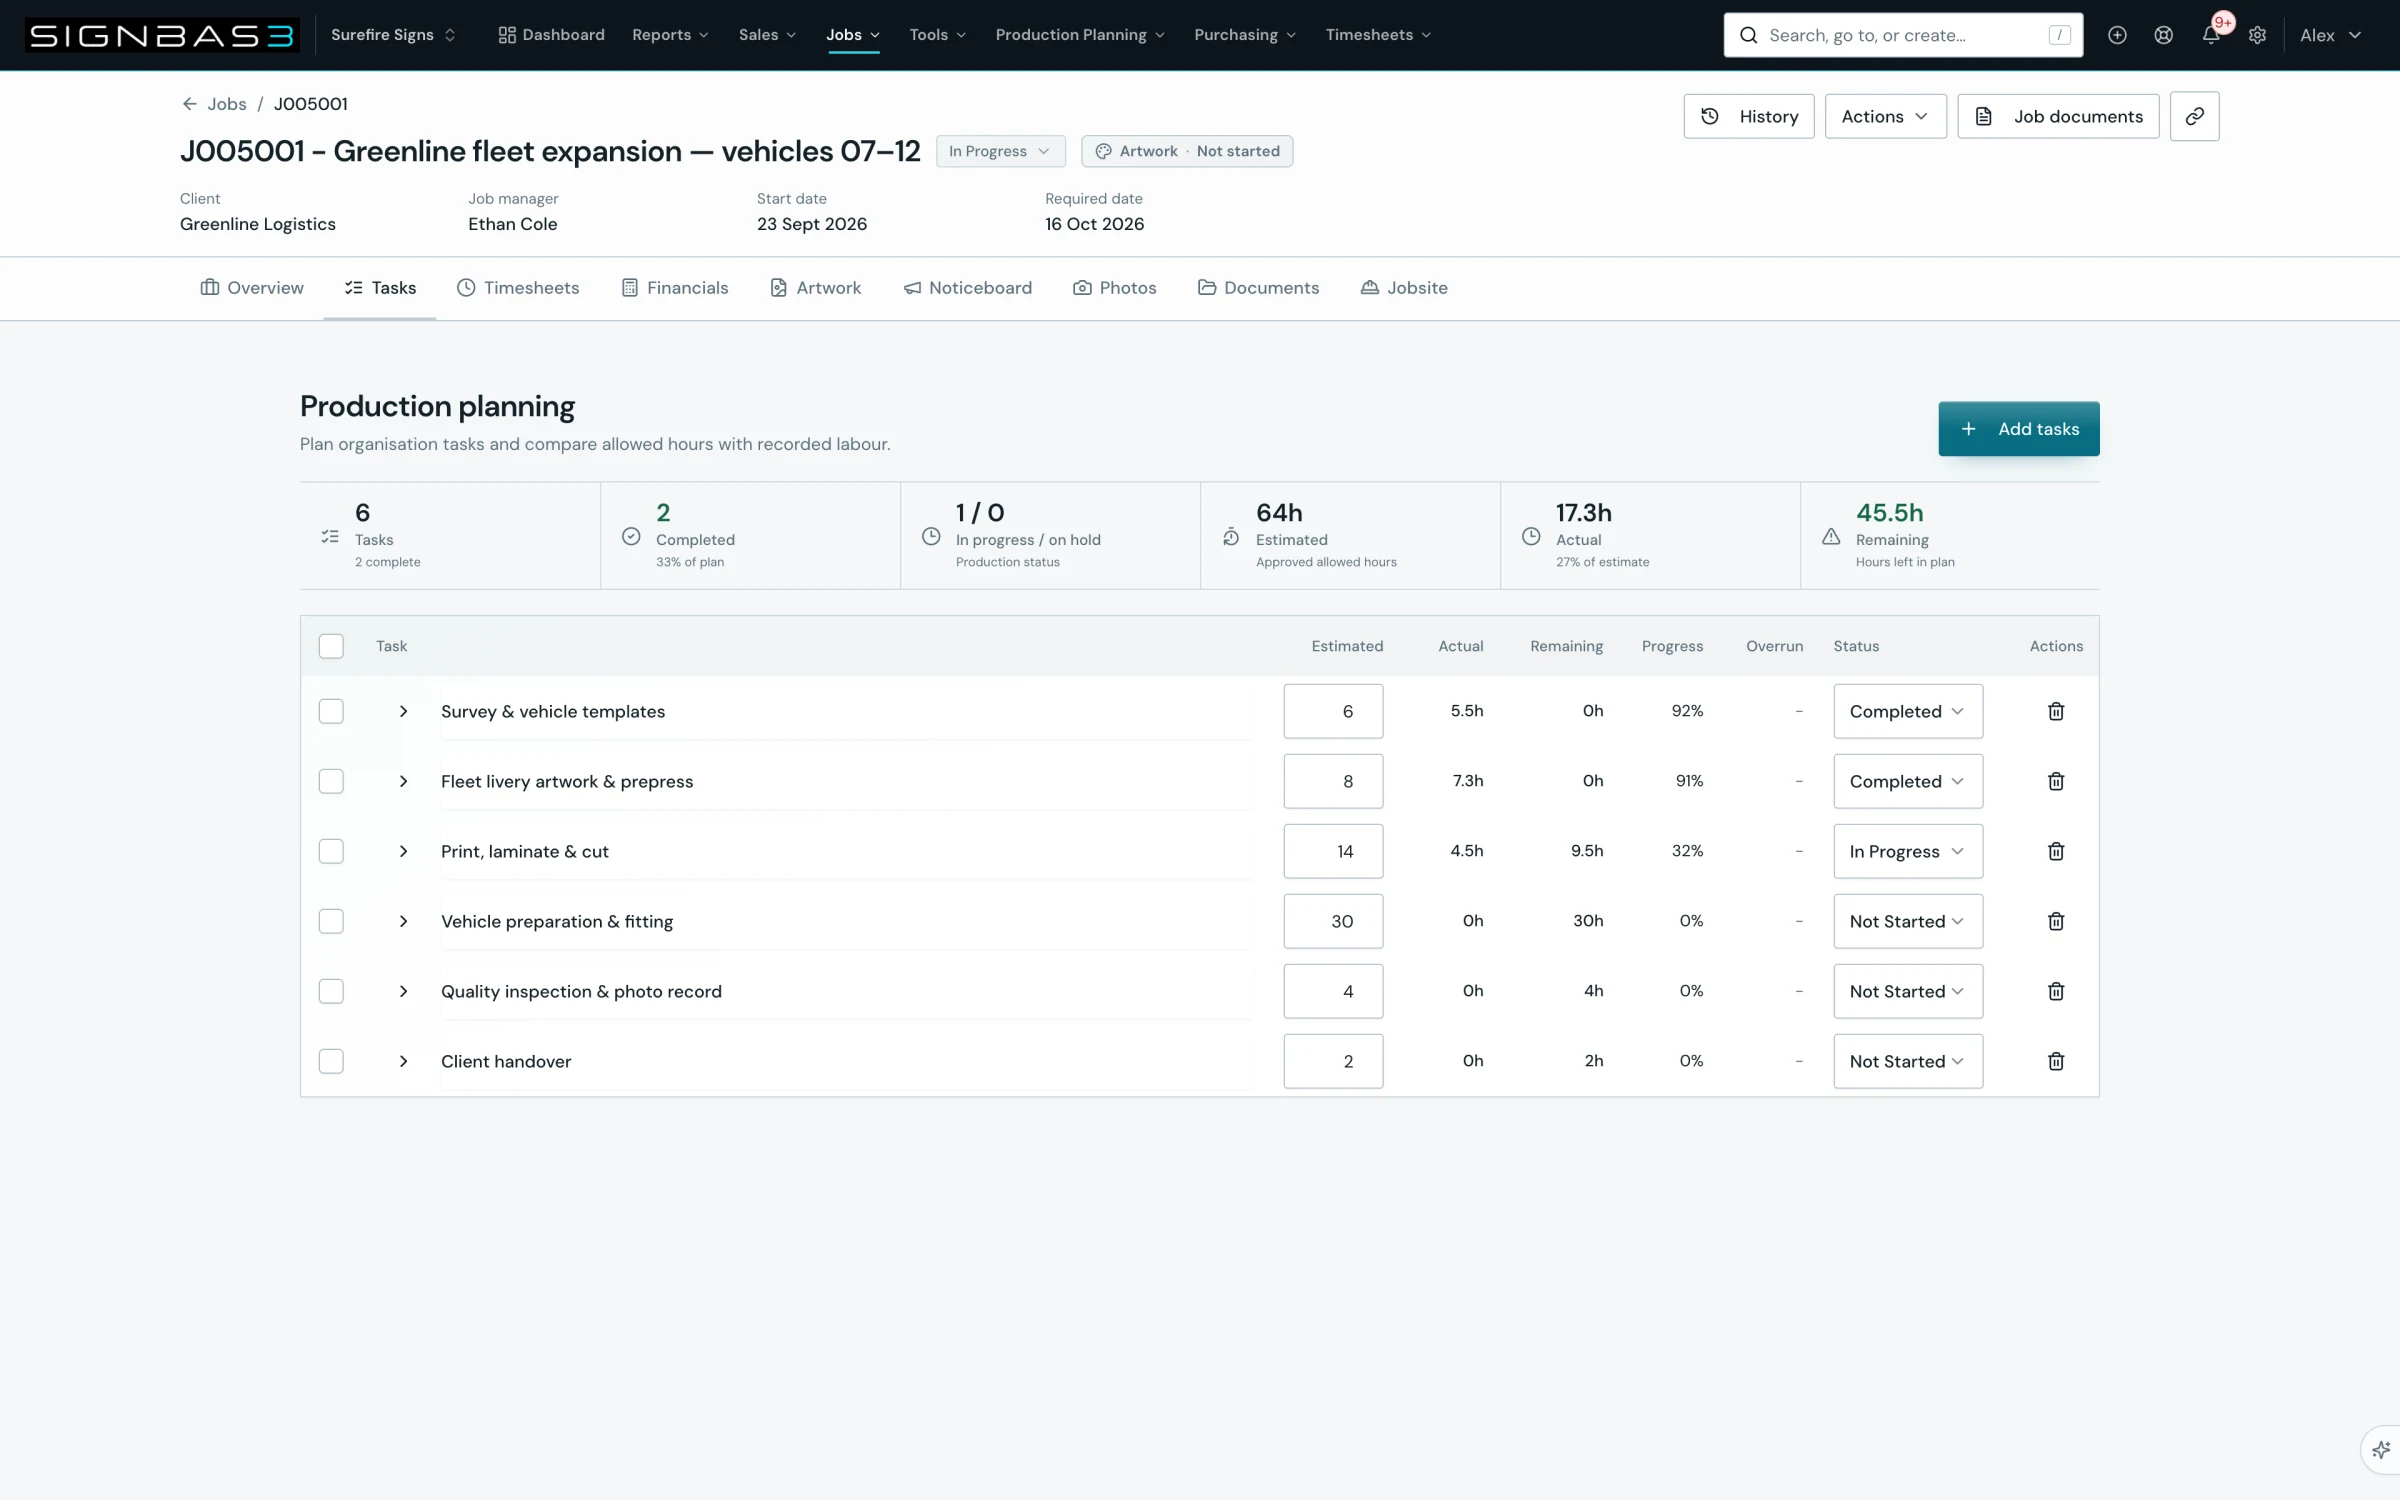
Step by step
- Open Jobs, narrow the list with All statuses or Search jobs…, then select the job name to open its workspace on the Overview tab.
- Read the header: the job number and name, the coloured status chip, the Artwork chip, and the Client, Job manager, Start date and Required date fields.
- Select the status chip and choose a configured status; SignBas3 confirms with Job status updated.
- Use Actions to start an invoice, quote, purchase order, job cost, task, timesheet, artwork upload, photo, document or notice from this job, and Job documents to print a job sheet, artwork brief, delivery docket or completion report.
- Move between Overview, Tasks, Timesheets, Financials, Artwork, Noticeboard, Photos, Documents and, on install jobs, Jobsite using the tab bar.
- On Overview, check At a glance, expand Job details to edit and select Save job details, review Job scope, then clear anything listed under Next actions.
- Record decisions in Noticeboard, then return to the list with the Jobs breadcrumb.
Good practice
Treat the job workspace as the only place a fact about the job lives. When the required date, manager, scope or install decision changes, edit it in Job details and save, then leave a short Noticeboard note explaining why.
Before you begin
- At least one job exists in the organisation.
- Job statuses are configured under Settings > Job Statuses.
Complete workflow
How the workflow moves
- 01Open
Find the job from the Jobs list and open its workspace.
- 02Read
Check the header, status chip, artwork banner and key dates.
- 03Act
Move the status, use the Actions menu and work inside the right tab.
- 04Record
Leave decisions on the Noticeboard and keep the source fields current.
Setup dependency
Settings that change this workflow
The same task can behave differently between organisations. Check these settings before treating a different result as an error.
/settings/job-statusesSupplies the statuses offered by the header status chip and the default status for new jobs.
Open in SignBas3 →/settings/job-custom-fieldsAdds the organisation fields shown under Custom fields inside the Overview Job details section.
Open in SignBas3 →/settings/jobsite-documentsDecides which regional safety documents appear on the Jobsite tab of install jobs.
Open in SignBas3 →Screen reference
What you will see
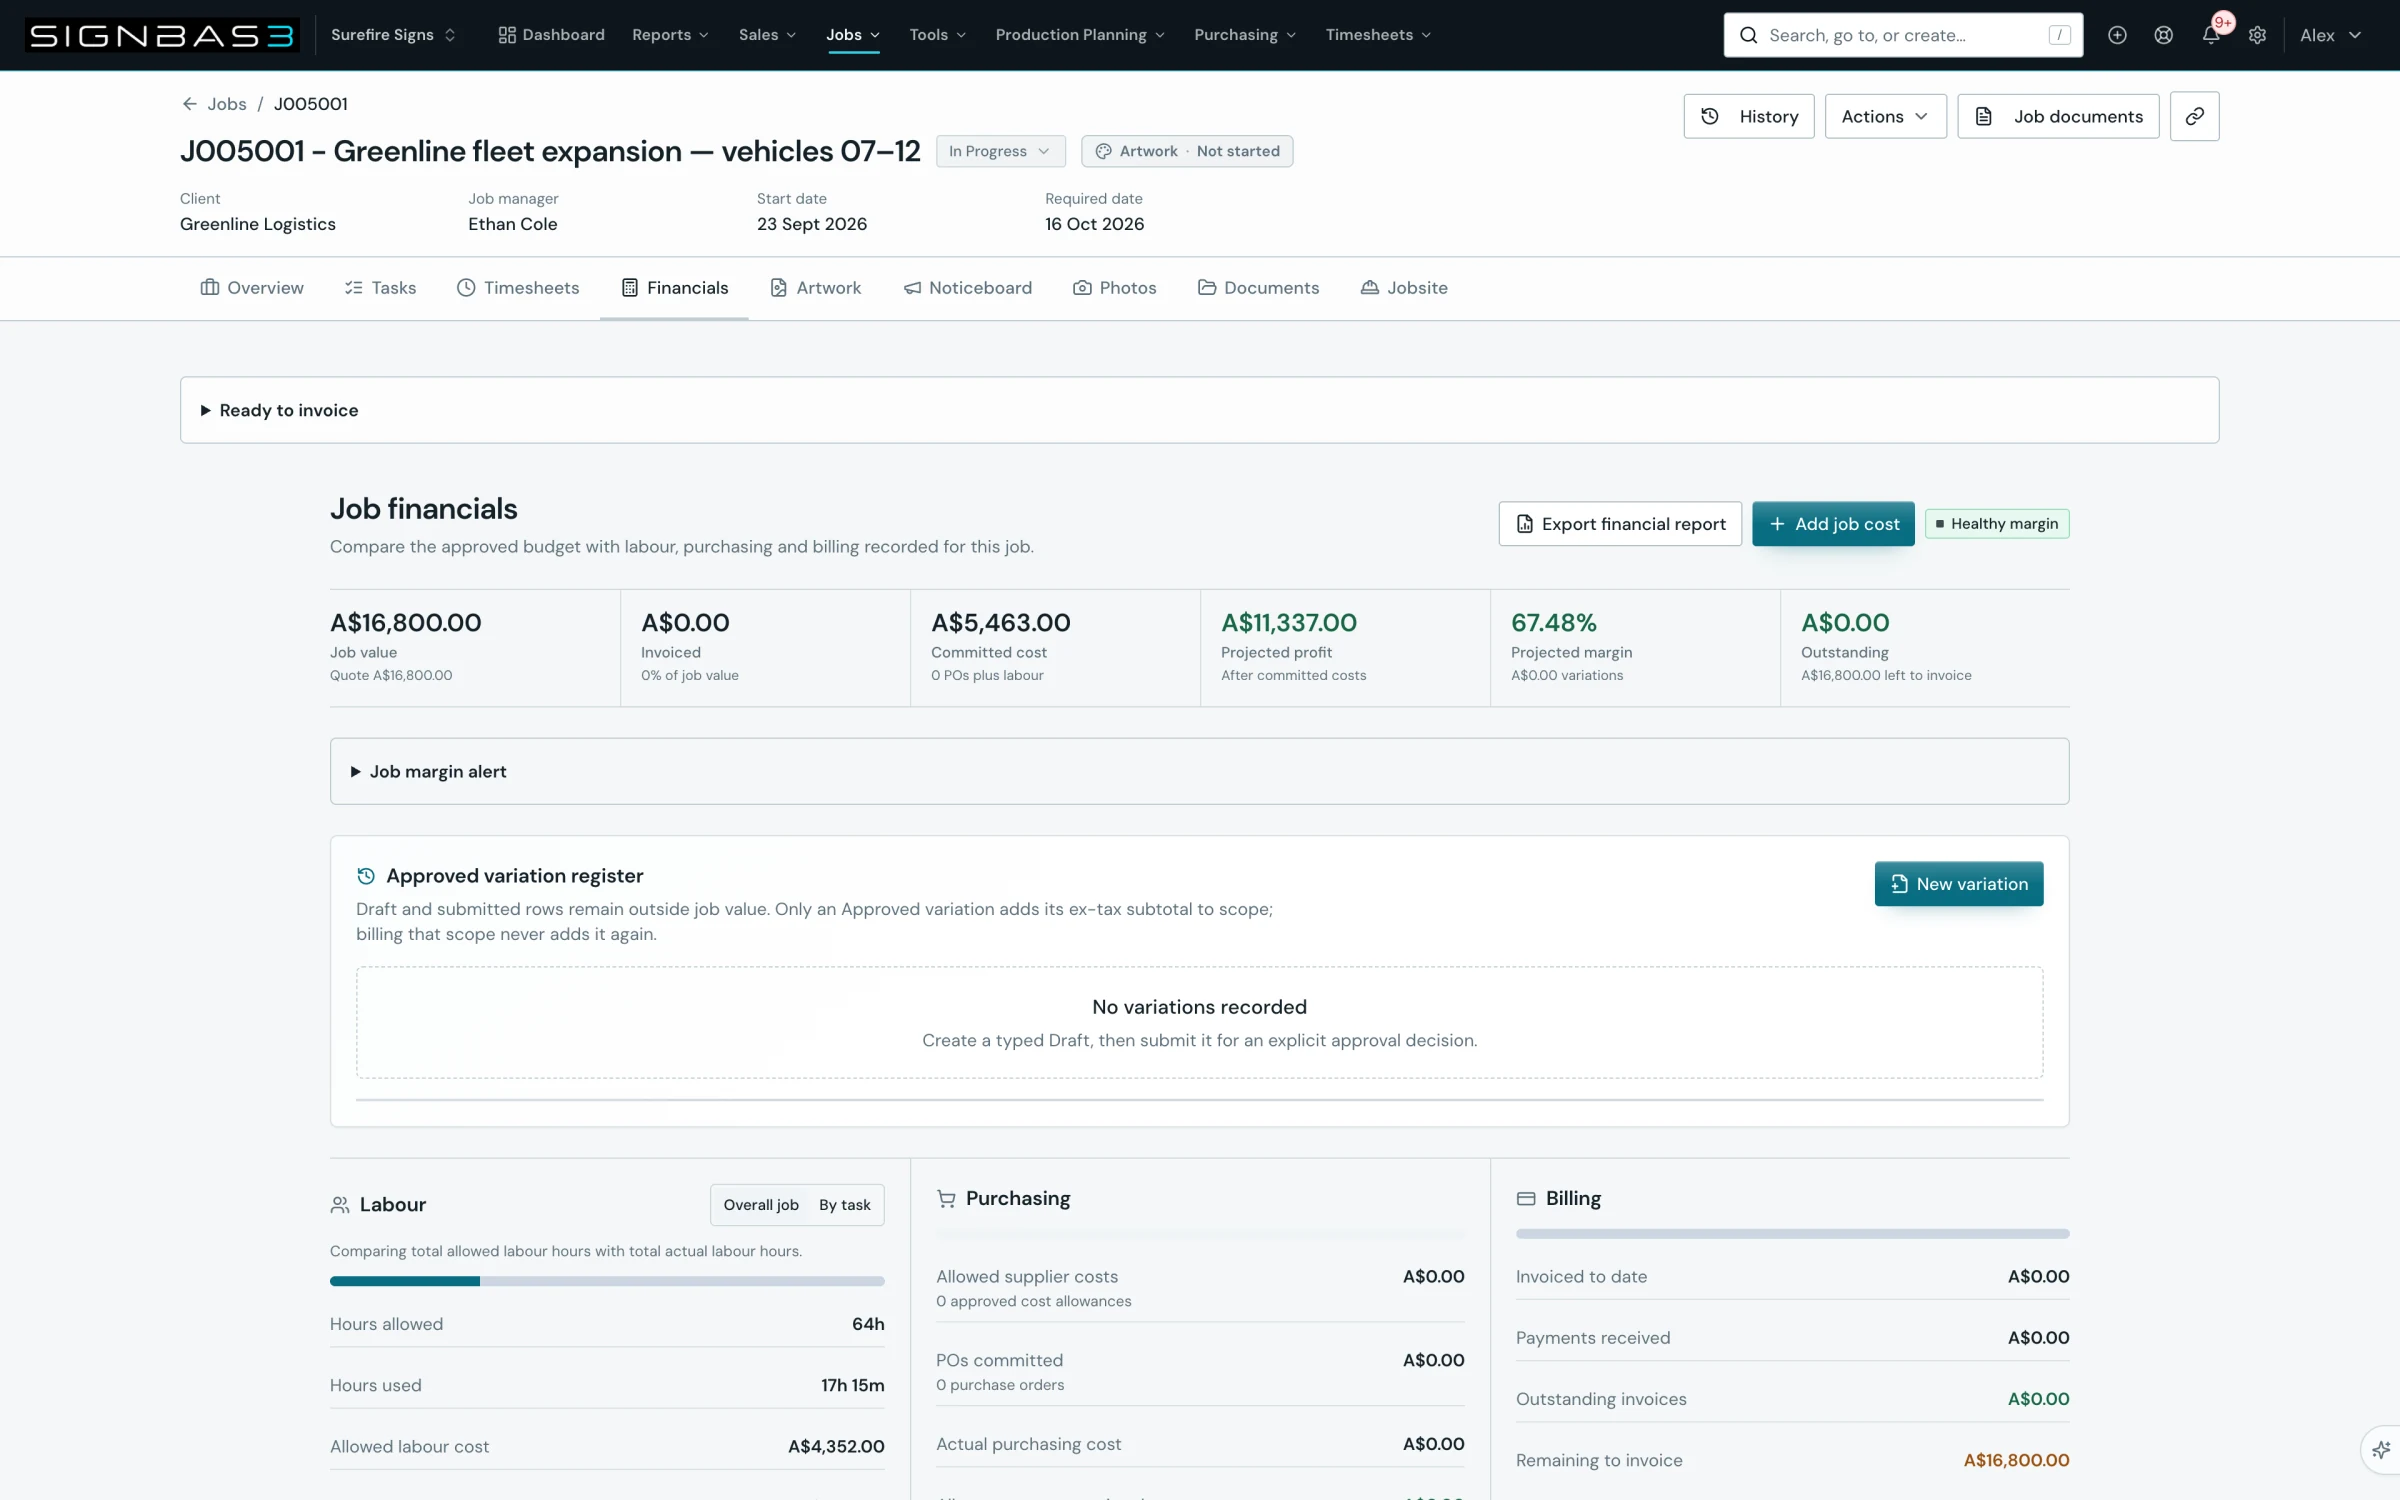
What this controls
The job workspace is the single record for everything after work is accepted: production planning, labour, purchasing and billing, artwork approval, site photos, project documents and, for installations, the regional safety pack. The Scheduler and Capacity Reporting read its tasks, invoices read its scope and billing, and the Jobsite safety pack is generated from its tasks and line items.
Before you start
- Every signed-in user can open a job workspace. Only Admin and Owner users see Delete job and Cancel job at the foot of the Overview tab.
- Configure statuses under Settings > Job Statuses first; see Set up job statuses.
- The header reads Unassigned until a Job manager is chosen in Job details.
Walkthrough
1. Open the job from the Jobs list
Jobs opens on the Active jobs view, with My jobs and All jobs beside it. Active jobs also offers All, Starting today, Due this week and Overdue views above a Work in progress, Invoiced and To be invoiced strip. Narrow the list with All statuses or Search jobs…. The job name opens the workspace; selecting elsewhere on the row opens a preview sheet with an Open job button and tab shortcuts.
2. Read the header
The heading shows the job number and, when set, the job name after a dash. Beside it sit the status chip, an Artwork chip reflecting the proof state, and Client, Job manager, Start date and Required date; an empty date reads Not set. On the right are History, the Actions and Job documents menus and a button that copies the job portal link.
3. Change the status
The status chip lists every active status from Settings > Job Statuses with a tick on the current one. Choosing another saves immediately and shows Job status updated. Cancelling is separate: on Overview an Admin or Owner selects Cancel job and confirms in the Cancel this job? dialog, or backs out with Keep job; the record and history stay available. Delete job beside it opens Delete this job? and removes the job permanently.
4. Use the Actions and Job documents menus
Actions is grouped by purpose. Commercial offers New invoice, New quote (or Create quote revision when a quote is linked), New purchase order and Add job cost. Labour and production offers Add task, Add time or timesheet and Upload artwork. Job records offers Add photo, Add document and Add notice. Each opens the right tab or form scoped to this job. Job documents offers Job sheet, Artwork brief, Delivery docket, Completion report and Custom & compatibility templates on the delivery page.
5. Move between the tabs
| Tab | What you find there |
|---|---|
| Overview | At a glance, Job details, Job scope, Next actions, Freight and installation, Production checklist. |
| Tasks | Production planning: KPI tiles, the task table and the Add tasks dialog with Custom task and Task templates. |
| Timesheets | Job timesheets with Hours by task and Hours by staff, plus Staff allocation and timesheet access for Admin and Owner users. |
| Financials | Job financials: value, cost and margin tiles, Labour, Purchasing and Billing meters, Job costs and purchase orders, Invoices, Purchase orders and Labour cost review. |
| Artwork | Current or Approved artwork, proof versions and Artwork history. |
| Noticeboard | Job noticeboard: Add a note, Team notes and Correspondence, with an unread count on the tab. |
| Photos | Site, production, install, completion and issue photo evidence. |
| Documents | Job documents and Sign asset exports in the job folder. |
| Jobsite | The Job safety pack. Shown only when Install is ticked in Job details. |
On a phone the tab bar becomes a Job view selector with Overview, Tasks and Timesheets as quick buttons.
6. Work the Overview tab
At a glance shows Production, Hours allowed, Hours used, Hours remaining, Artwork and Install, plus a Quote button when a quote is linked. Job details is collapsed by default; expand it to edit Job name, Site address, Client, Job manager, Job start date, Required date, Job status, Payment arrangement, the Freight and Install ticks and Notes, then select Save job details or Discard changes; the panel reads Unsaved changes until you save. Source links and Custom fields sit in the same section. Job scope lists the line items with Unit sell and Line total; select Add item when the scope is editable, or note the Quoted scope locked · use Variations badge when it comes from an accepted quote. Next actions appears only when something needs attention, for example Set required date, Review scope, Clear blocked tasks or Set install status, and each row links to the tab that fixes it.
7. Record and return
Use Add a note on the Noticeboard for decisions. The Jobs breadcrumb returns you to the list.
What changes elsewhere
- Changing the status updates the Jobs list and, per the status settings, My jobs and Scheduler visibility.
- Ticking Install in Job details adds the Jobsite tab and starts the safety pack workflow described in Create and review a jobsite safety pack.
- Tasks added here appear at /staff-scheduler and /capacity-planning.
- Invoices, purchase orders and job costs started from Actions land under Financials.
Common problems
| Symptom | Cause | Fix |
|---|---|---|
| No Jobsite tab | Install is not ticked. | Expand Job details on Overview, tick Install, select Save job details. |
| Status chip offers nothing useful | No statuses are configured or the one you need is Retired. | Add or reactivate it under Settings > Job Statuses. |
| Add item is replaced by Quoted scope locked · use Variations | The scope came from an accepted quote. | Create a quote revision from Actions and record the change as a variation. |
Check your work
- The header shows the job number, a status chip and a named Client, Job manager and Required date.
- Changing the status shows Job status updated and the new status appears on the Jobs list.
- Every tab you need opens, and Jobsite is present on install jobs.
- Next actions on Overview is empty or lists only deliberately deferred items.
If your workspace behaves differently, record the relevant job, client or record number and raise a support ticket so the team can investigate the exact context.